Mounting recovered VMDK files
First you will need to scan the ESX disk using VMFS Recovery™. I would recommend using the “Uneraser” mode instead of “Full Recovery-VMFS” as it works much faster and offers almost the same results as a full disk scan does.
Next, we always recommend plugging ESX disks directly into the Windows machine, instead of using SSH, however, if you use it, please make sure you are connecting in “Hard Disk drive” mode. The latter allows reading disk directly and allows actual VMFS reconstruction.
It is also not recommended to use the “Full Recovery” mode when connected via SSH. Such scan could be enormously slow, up to several weeks before finish compared to a couple of hours for “Uneraser” mode.
After scan is complete, please browse for required *.vmdk file, right click on it and select “Expert->Mount as disk”.

All checked vmdk files will be added to disk list to the "Containers" section.

Same way you can mount snapshot vmdk:
Please note, you need to select all snapshots files and the original *.VMDK, if you need the latest version. Selecting only *-flat.VMDK will display only data stored at this snapshot, no newer data will be available. If you select only the latest snapshot of the branch, most data that should be stored in previous snapshots will be corrupt or not displayed.
You need to add all snapshots at once in order to gain access to the data.
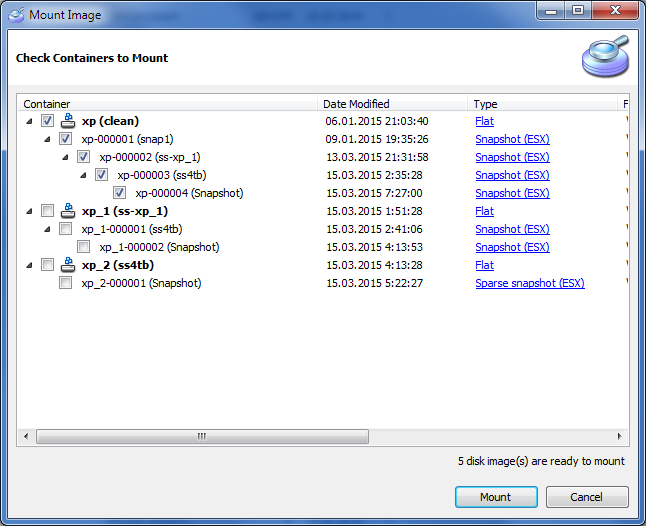
For example, please look at the screen above, to scan the latest version of your data you'll need to select the latest *.VMDK, so this should be “XP-000004”.