Recovering data from VMware ESX/ESXi and vSphere servers
Welcome to DiskInternals VMFS Recovery™, your enterprise data recovery tool. VMFS Recovery™ will help you recover data from VMWare virtual machines, even if the virtual disks are physically stored on a RAID array, NAS device or Dynamic Disk.
Recovering data from one or more virtual machines is a complex process streamlined by several step-by-step wizards. Depending on your situation, you may have to use one or more of these wizards. This chapter introduces the data recovery modes available in DiskInternals VMFS Recovery™.
Content
Introduction
Recovering Virtual Disks
Saving the Data
Introduction
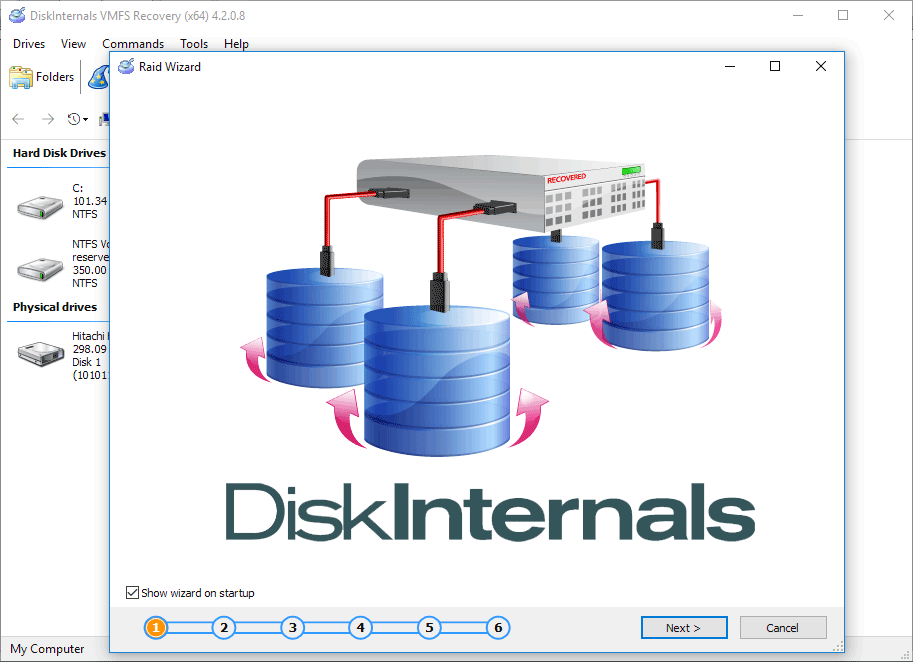
The three wizards available include RAID Wizard, Disk Recovery Wizard, and Export Wizard.
RAID Wizard: Use if your virtual machines or other recoverable data are stored on a decomposed, failed, or corrupted RAID array, or if they were stored in network-attached storage (NAS) device. You may skip this wizard if your RAID array is fully operational and mounted AND the virtual machine file is fully accessible (not deleted), or if you don’t have a RAID at all.
As the name suggests, the RAID Wizard is designed to deal with data stored on multi-disk arrays such as RAID or Dynamic Disk, including those that are part of network-attached storage (NAS). RAID Wizard helps you reconstruct a failed array or a bunch of disks you’ve taken out of a NAS, reassembling the correct configuration out of the bunch of disks that used to be parts of the array. RAID Wizard will help you mount the array even if your original RAID controller has failed, or if you don’t have a compatible RAID controller or NAS at all.
Please note that even if your NAS array is fully accessible, you may still need to shut it down, take the disks out and connect them directly to your computer’s SATA ports if you need to recover deleted files (e.g. the entire virtual machine file is deleted). If, however, you are recovering VMFS from a virtual machine file that is fully accessible, you may continue using the NAS drive.
However, if your RAID array or Dynamic Disk is fully functional, mounted, and accessible as a drive letter, and your virtual machine files are fully accessible and not deleted, you may simply skip the RAID Wizard and go directly to Disk Recovery.
Disk Recovery Wizard: Use to recover all types of information from the disk, including RAID arrays reassembled and mounted by the RAID Wizard.
Disk Recovery Wizard is the actual tool that scans storage media such as physical hard drives, memory cards, USB sticks, mounted RAID arrays, or VMDK (VMWare Virtual Machine Disk) files looking for recoverable information. Disk Recovery Wizard can be used for both locating and unerasing a deleted VMDK file as well as for mounting and analyzing the virtual file system (VMFS) partition contained in such files.
Export Wizard: Use to actually save information located by the Disk Recovery Wizard.
Export Wizard will guide you through the process of saving files discovered by the Disk Recovery Wizard. In a case, your VMDK file was deleted (or stored on a corrupted, formatted, or deleted partition), you will need to locate it with Disk Recovery Wizard first, recover it with Export Wizard, then run Disk Recovery Wizard again to mount the VMFS volume and recover any files and folders contained within the virtual drive container.
The following chapters will describe the use of each wizard in more detail.
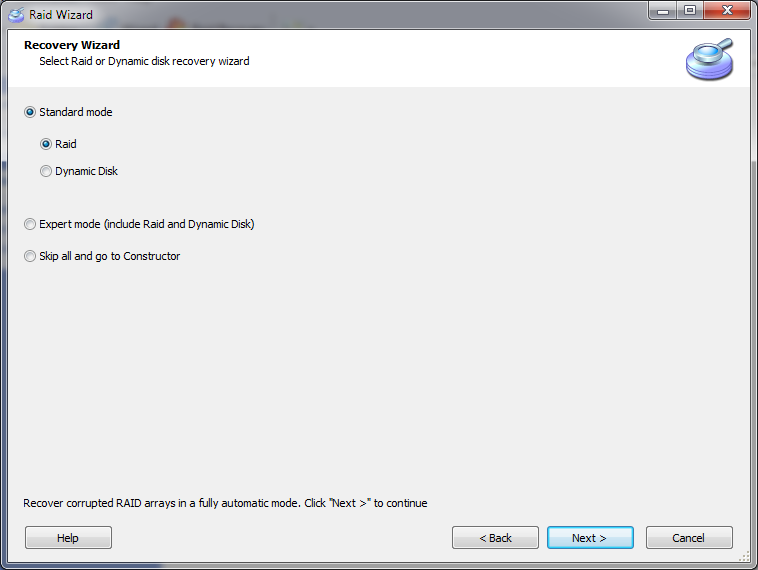
The essential first step of the recovery process is recovering the files that host your virtual machines. These files may be stored on a single physical disk or on a RAID array. If you are using a RAID or a Dynamic Disk and if that configuration failed, VMFS Recovery™ will attempt to rebuild the array and extract the virtual machine host files before recovering any data from these virtual machines. If you would rather assemble your RAID/Dynamic Disk manually, choose Skip and go to Constructor.
Note: if your hard drive/RAID/Dynamic Disk is fully operational and accessible, close the RAID Wizard and go directly to Recovering Virtual Disks.
If your virtual machine files are located on a RAID or stored on a Dynamic Disk, select the corresponding option and click Next. If you would rather use the Expert mode allows you to configure storage parameters individually, select Expert mode.
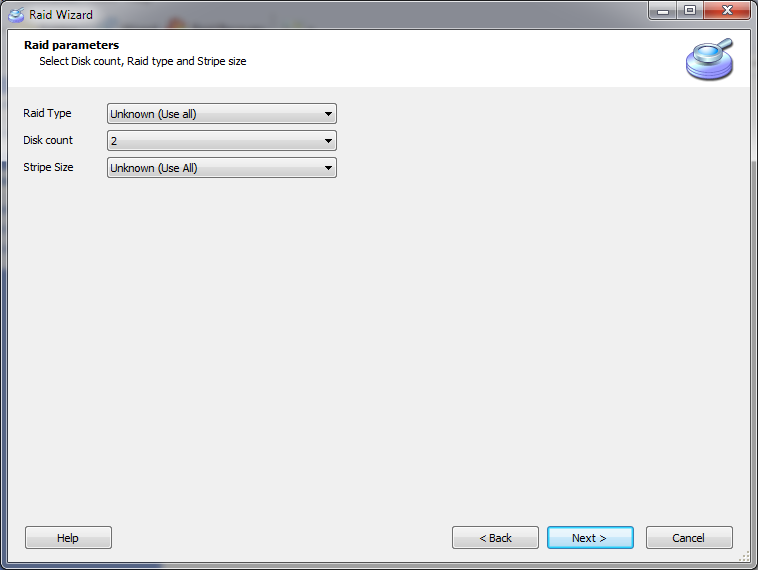
On the next step of the recovery process, specify the type of your RAID array, the number of disks comprising the array, and stripe size (if known). If you don’t know the type of a RAID array or its stripe size, leave these settings at their default values.
In the Constructor window, you can manually specify individual disks comprising the array.
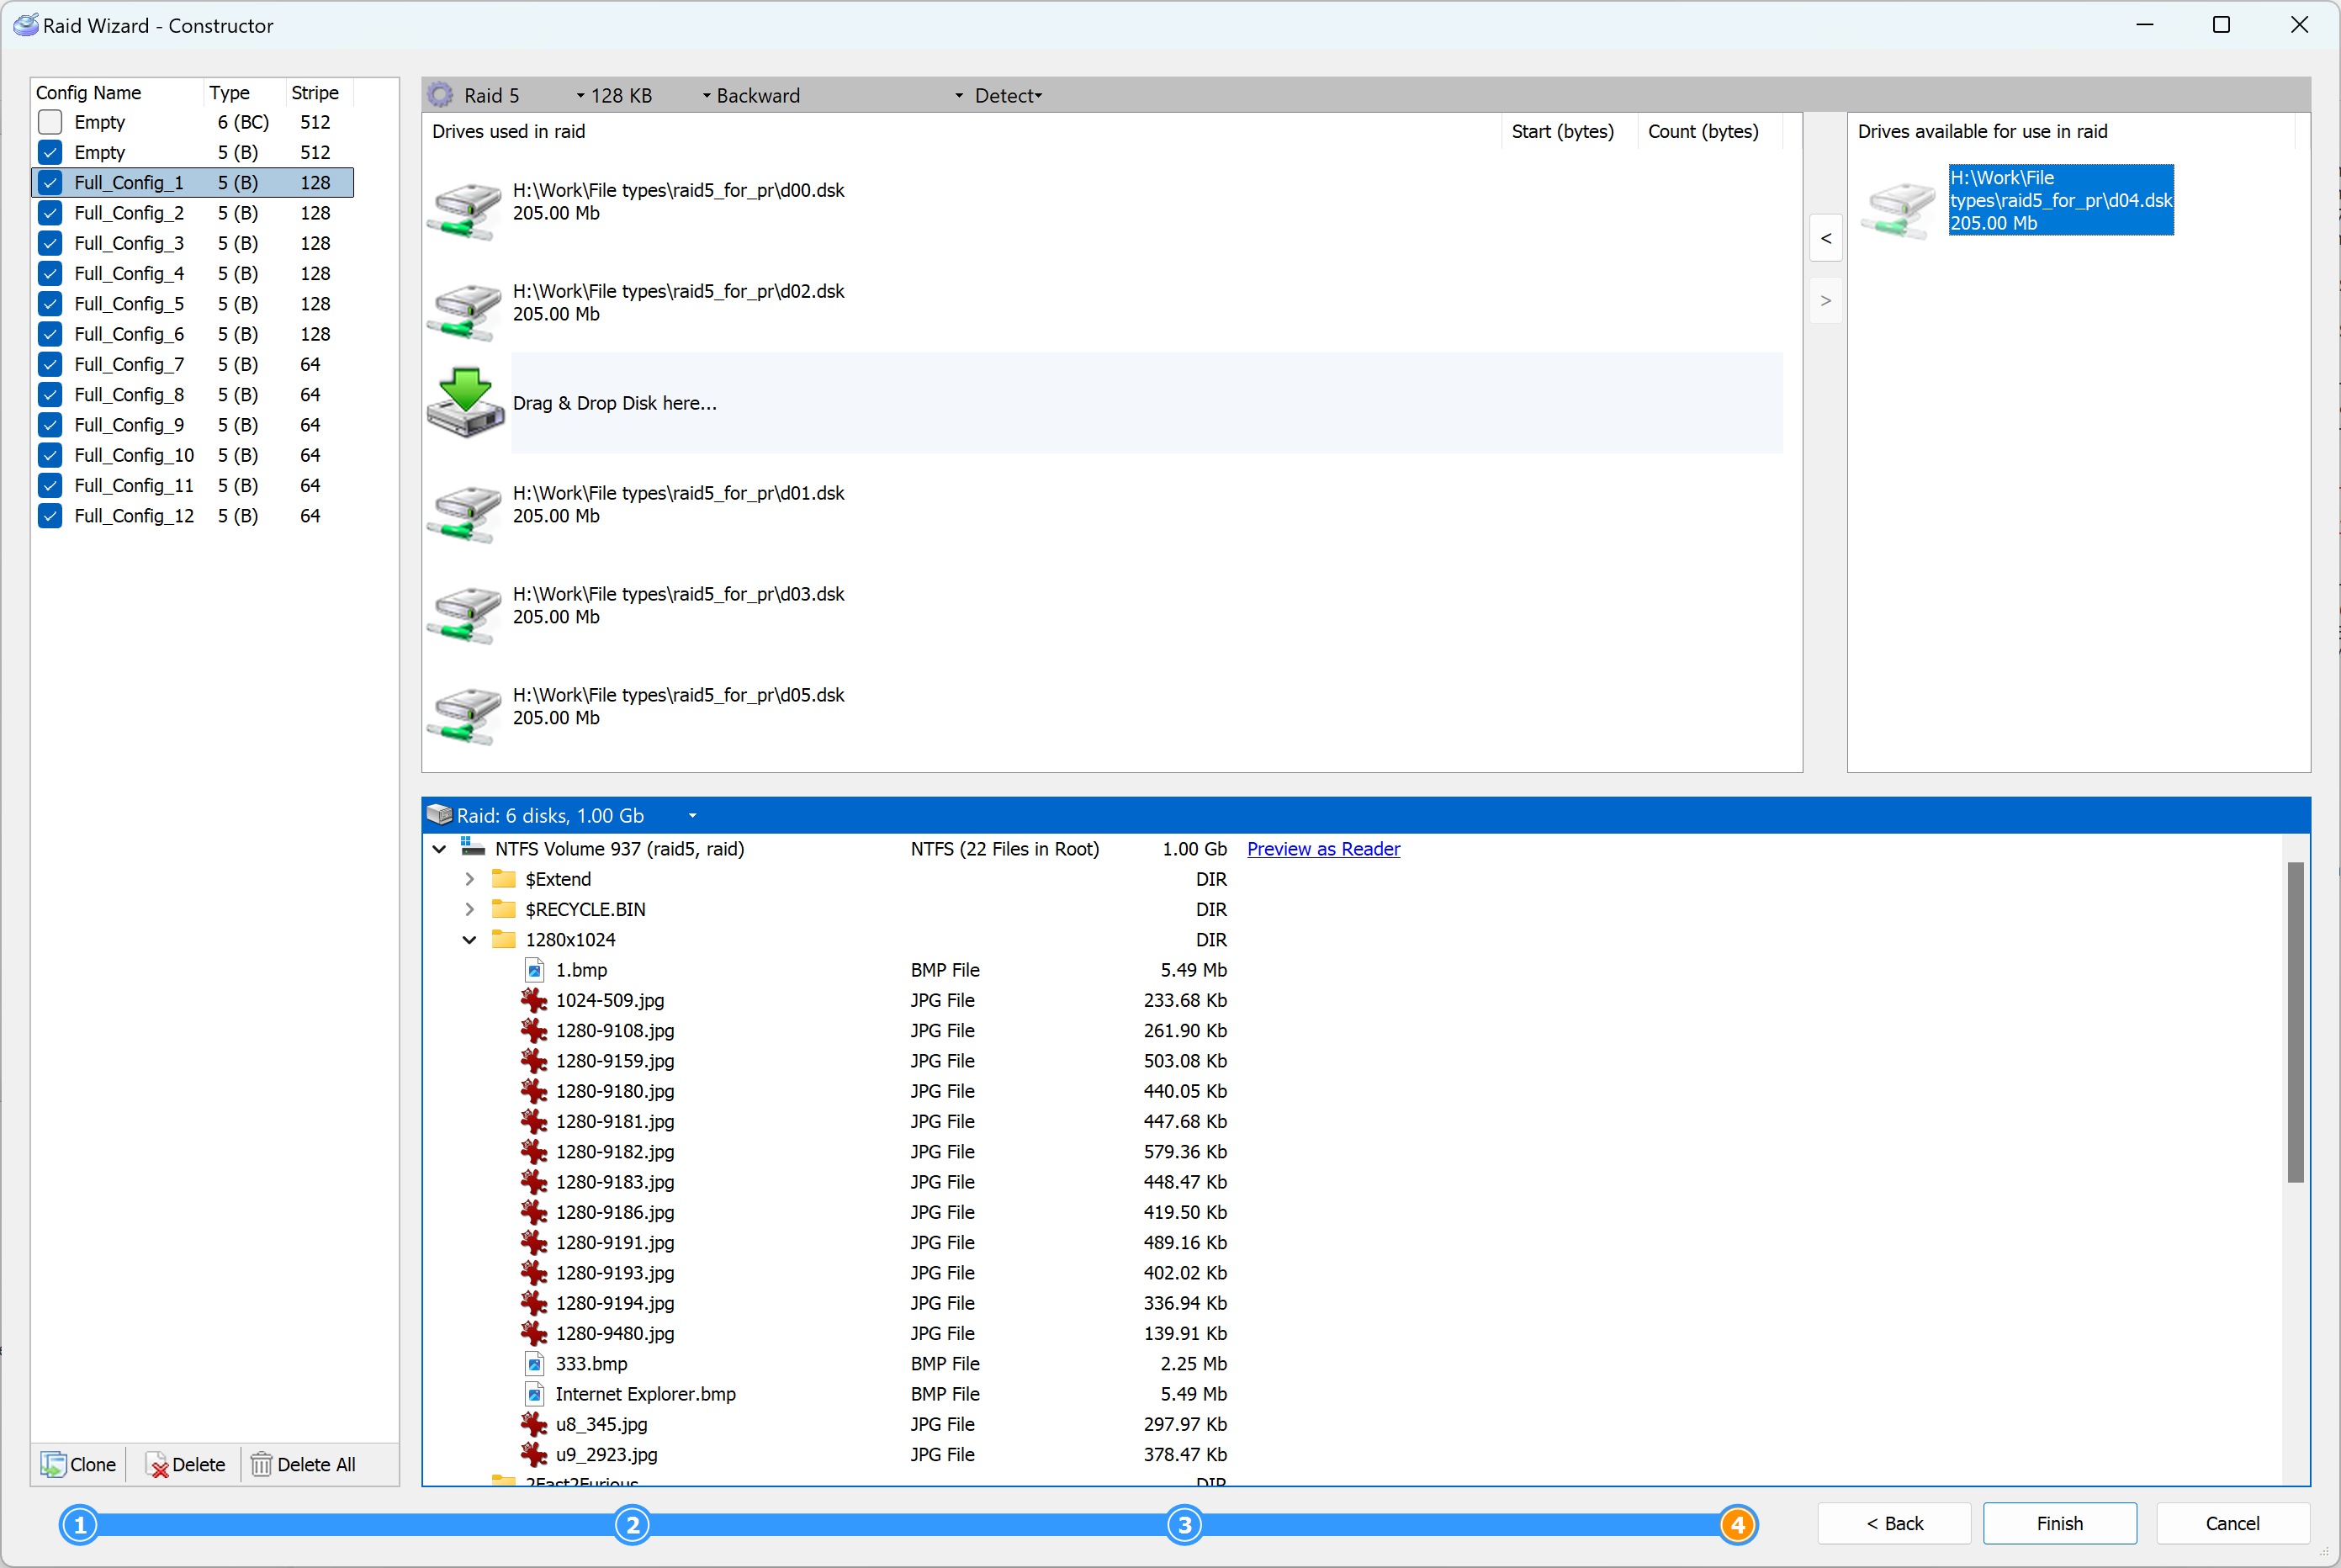
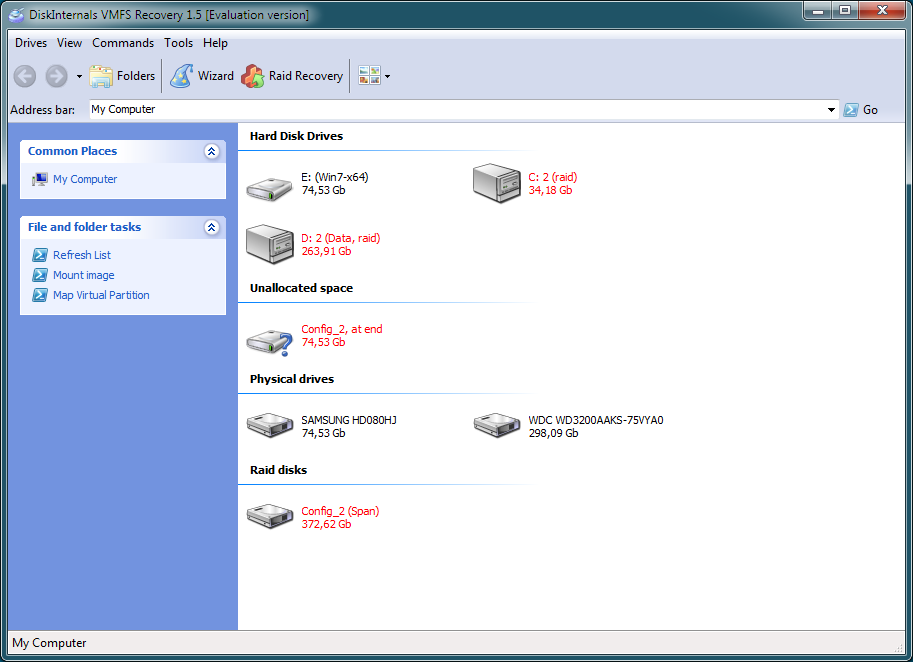
After the RAID reconstruction wizard has finished, the tool will display detected RAID configuration (marked in red). You will need to select a disk, physical device or a RAID volume to recover the virtual machine files from.
Recovering Virtual Disks
To mount the virtual disk drive, use the Drive – Mount Disk command from the main menu.
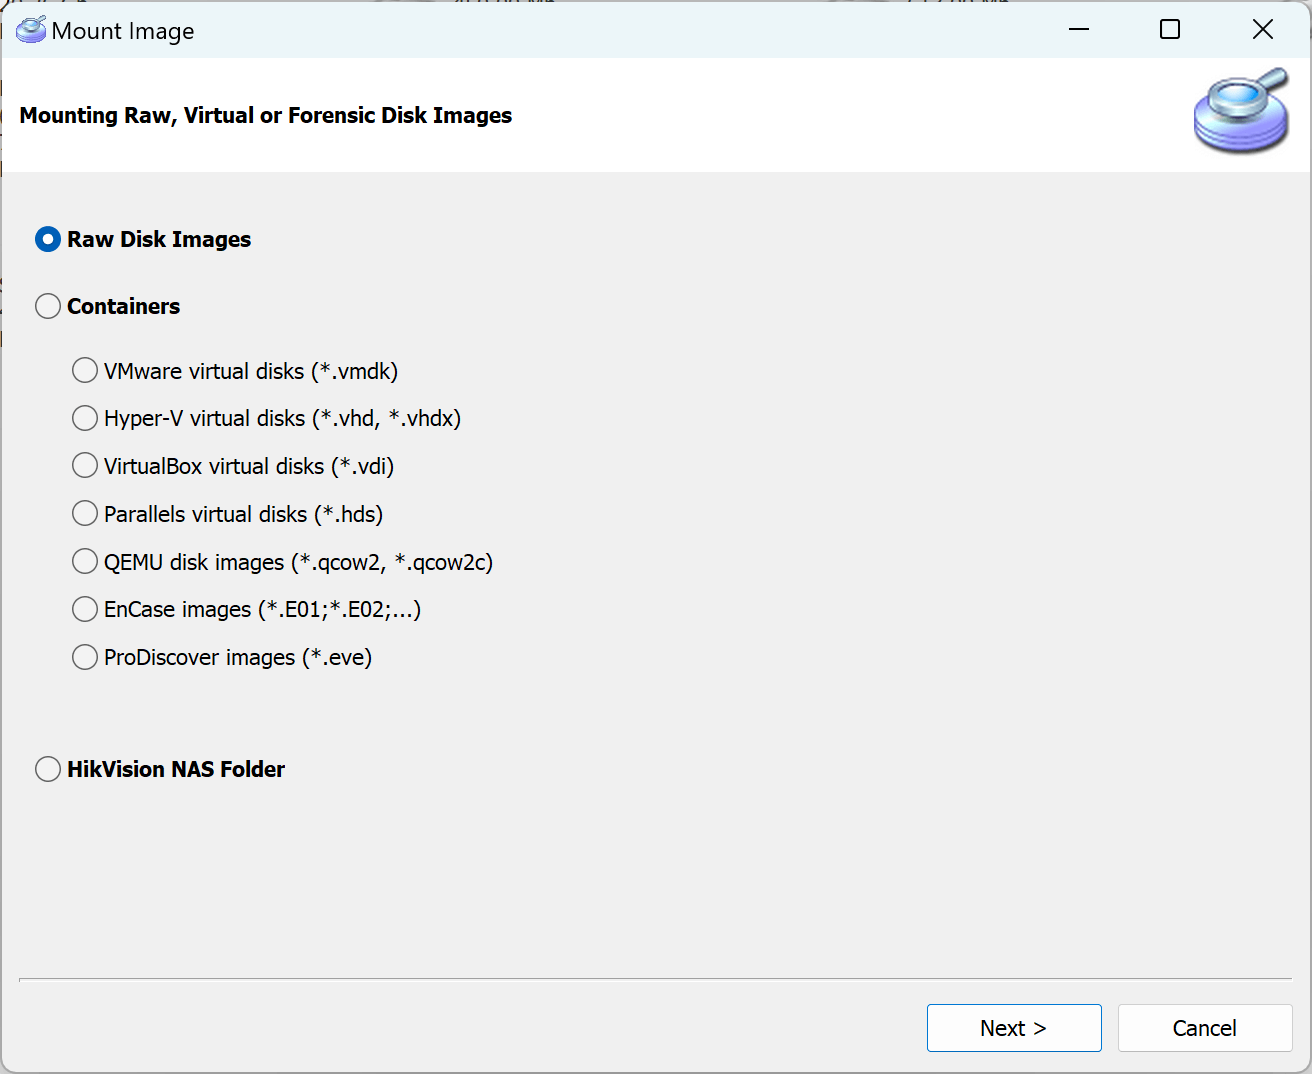
You can mount either a disk/memory drive image or a file containing a virtual machine VM disk.
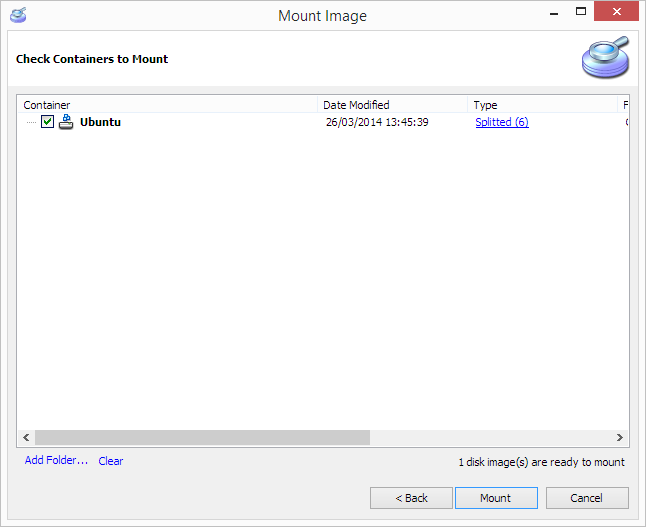
In order to mount the disk, you will need to specify a folder containing virtual machine disks. The following screen shot demonstrates a folder containing VM disk files.
The Disk Recovery Wizard will be launched.
Note: DiskInternals VMFS Recovery™ is not limited to recovering data from VM disks. You may recover information from many types of storage media including physical hard drives and logical disks, flash storage devices, disk images, RAID arrays and Dynamic Disk volumes even if they do not belong to a virtual machine.
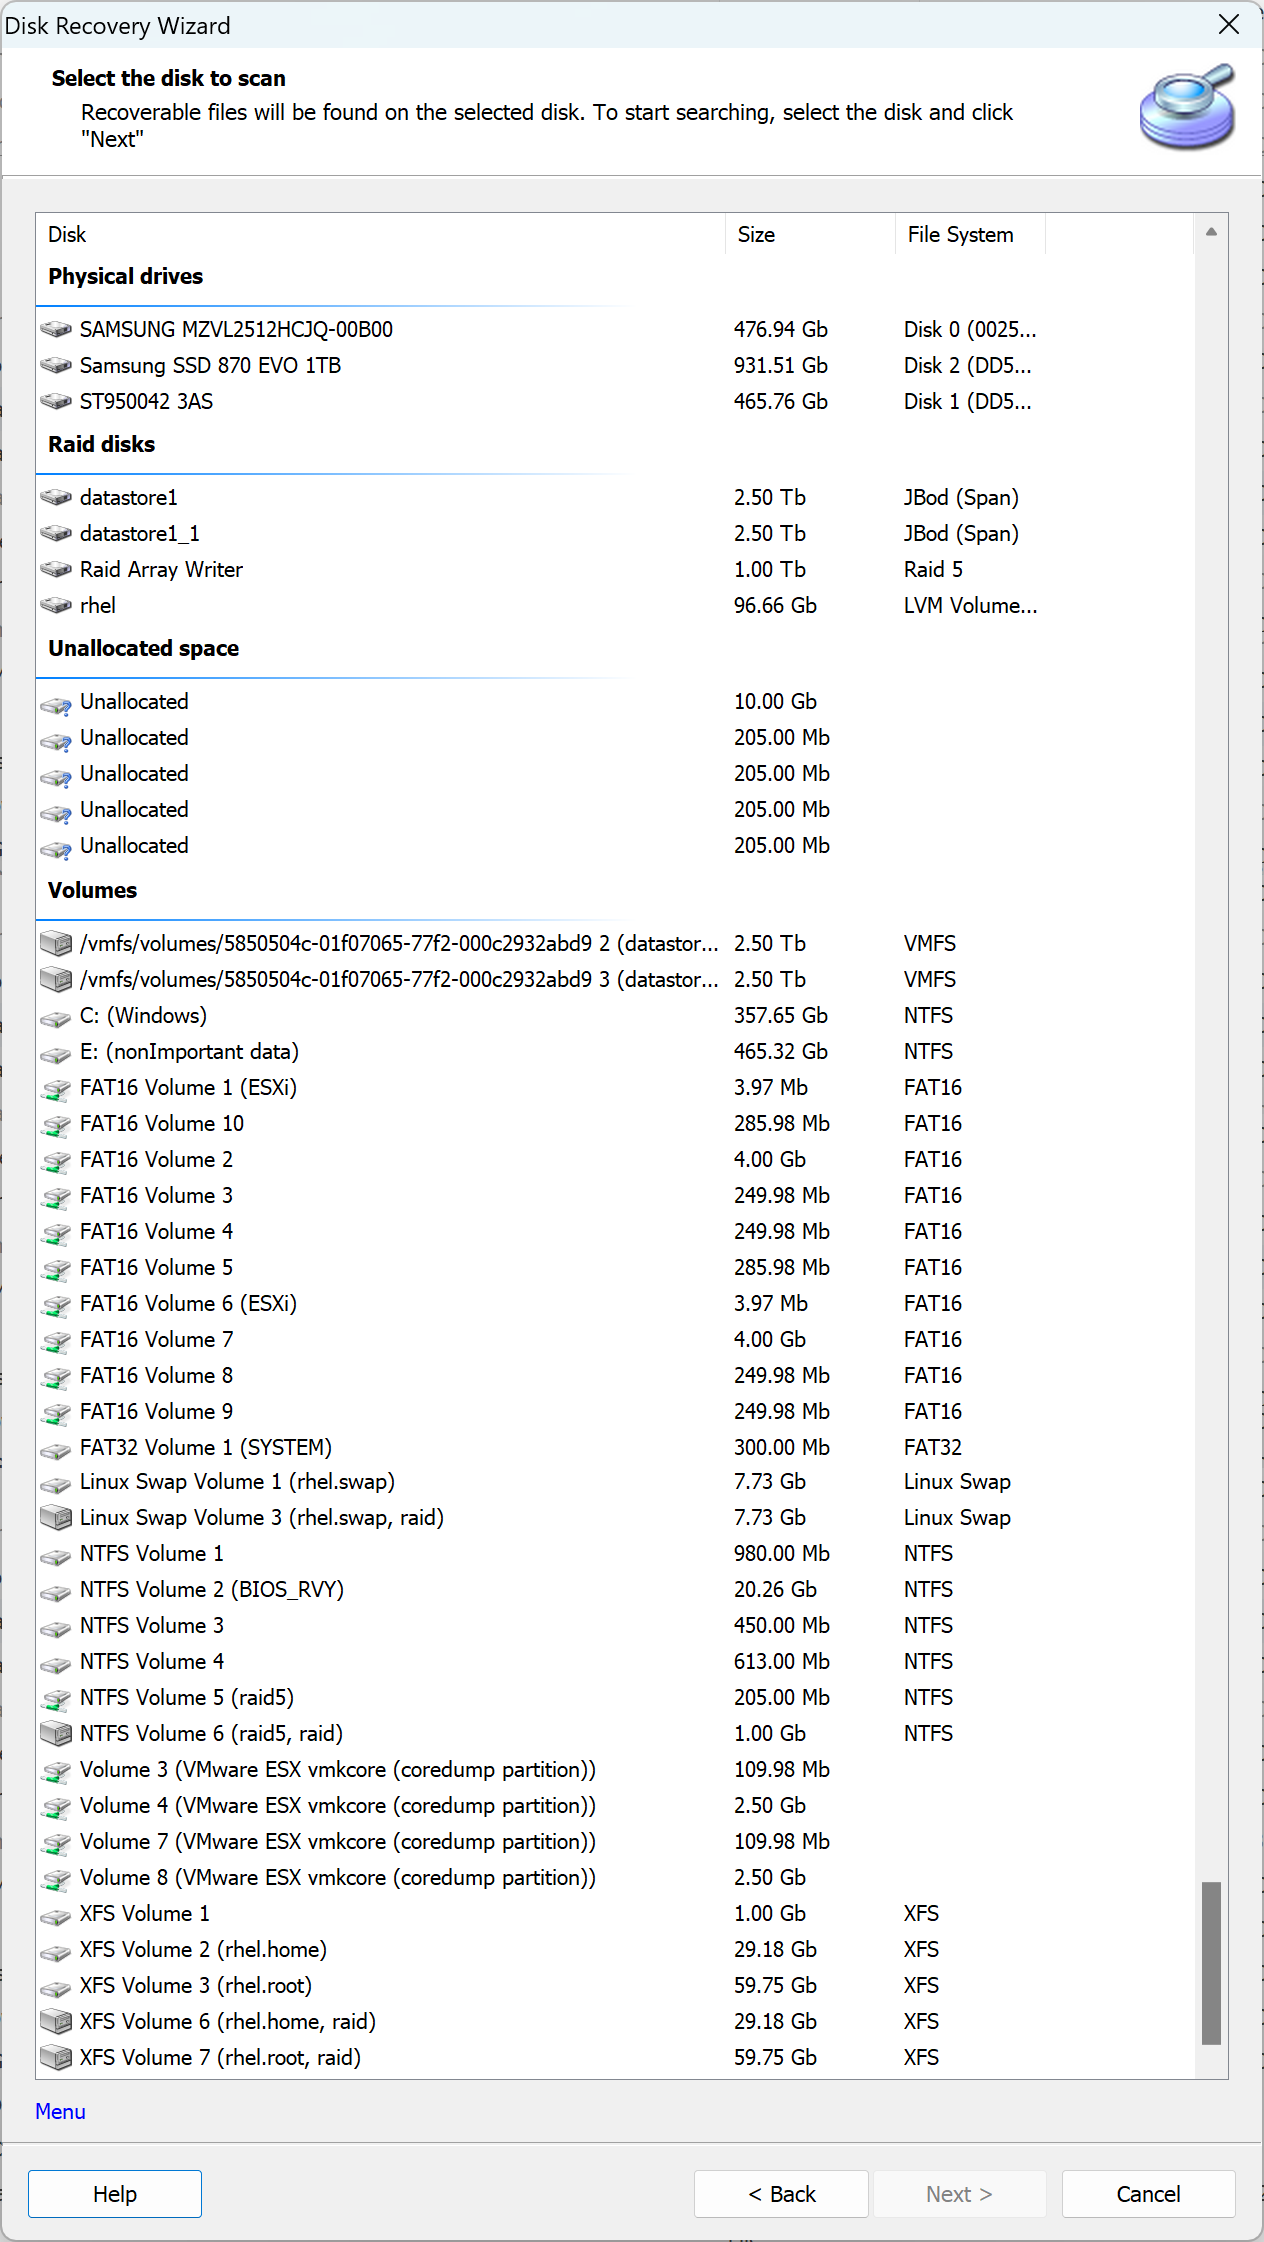
Specify the disk or RAID array to search for recoverable files.
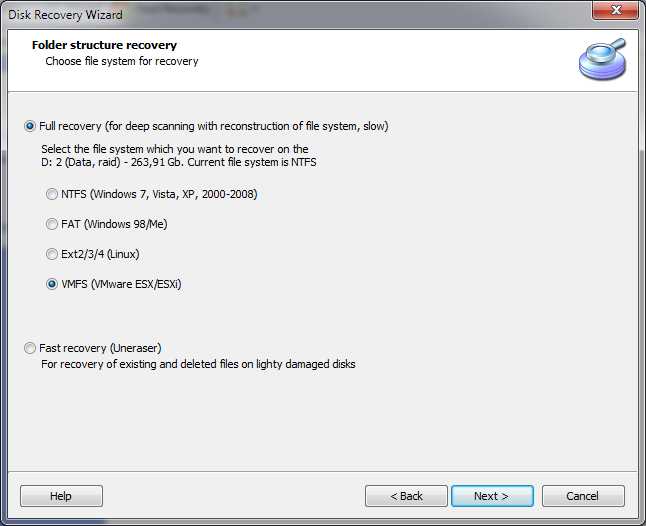
Specify the recovery type. You may choose to perform the complete recovery (recommended for badly damaged disks or if the fast option failed to recover certain data), or only scan for deleted files if the damage to the disk is light.
Note: when performing Full recovery, you will need to specify the file system. If you are recovering a virtual machine in VMWare ESX/ESXi format, choose VMFS.
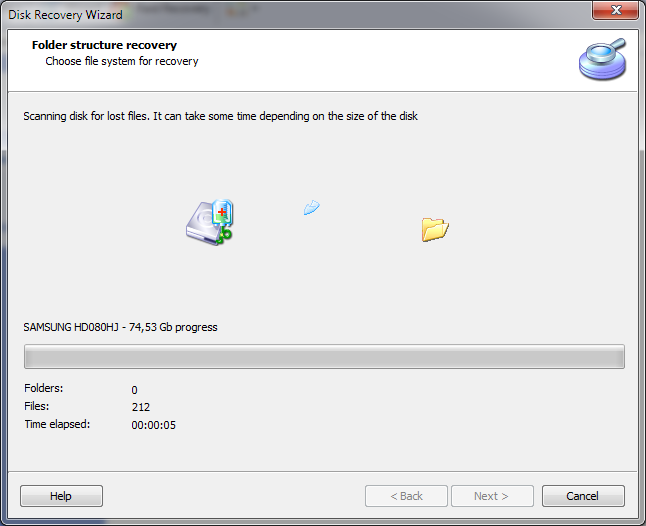
The tool will scan the selected disk for recoverable data. Depending on the size of the storage media, this may take a long time.
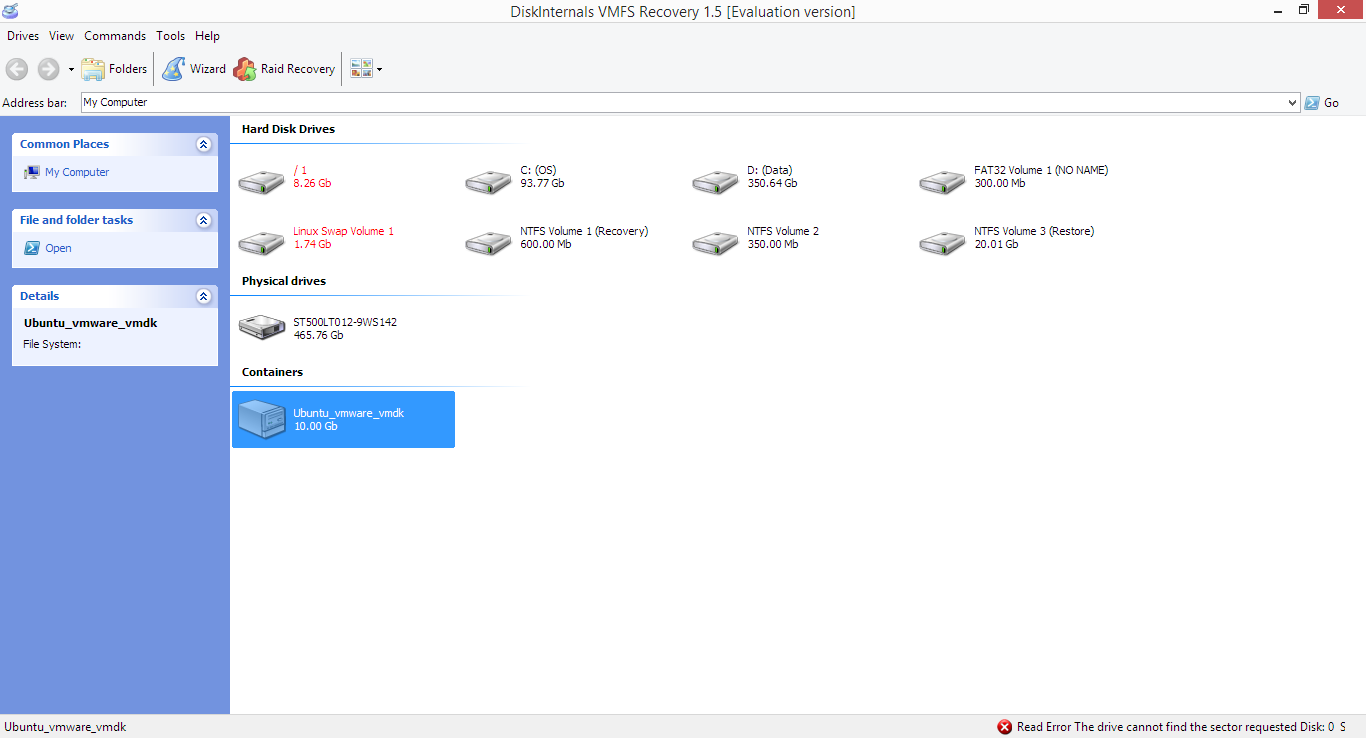
After the scanning is complete, the tool will automatically open the disk. The following screen displays an Ubuntu VM image with two logical Ext3 volumes.
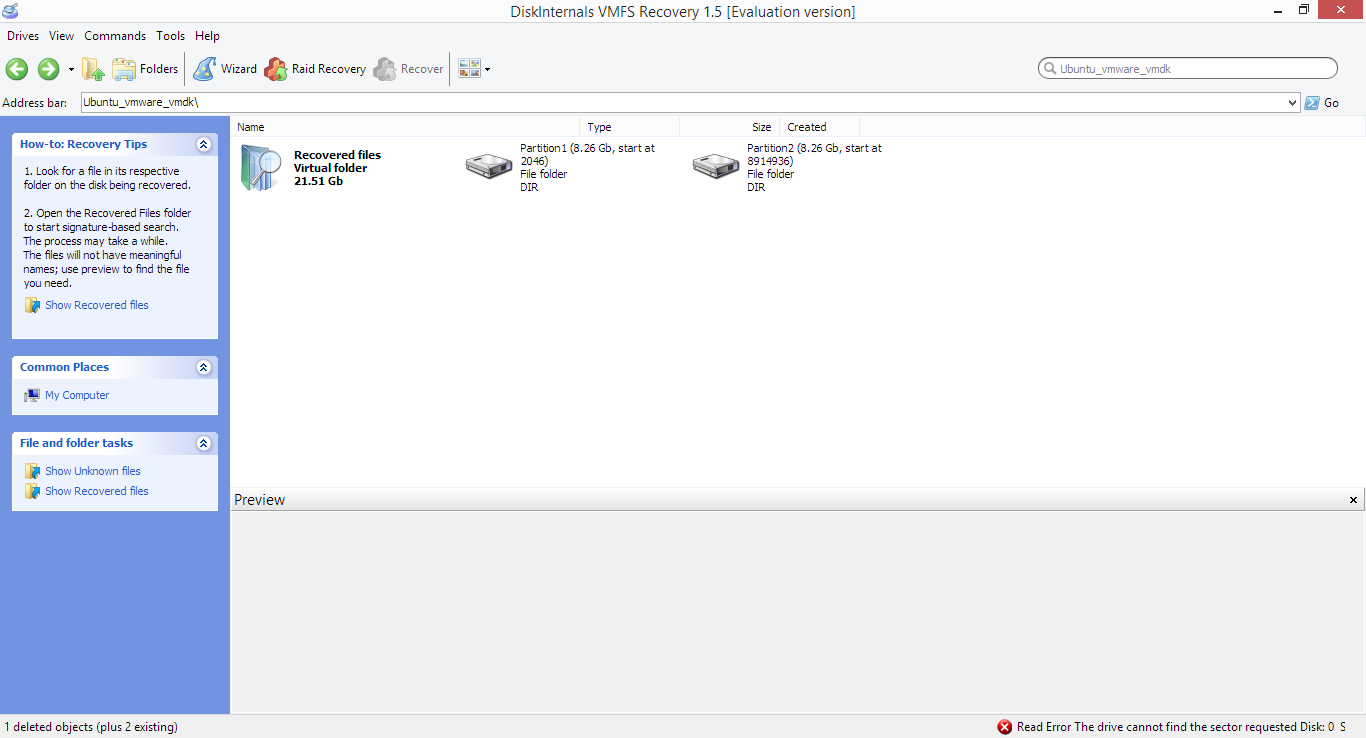
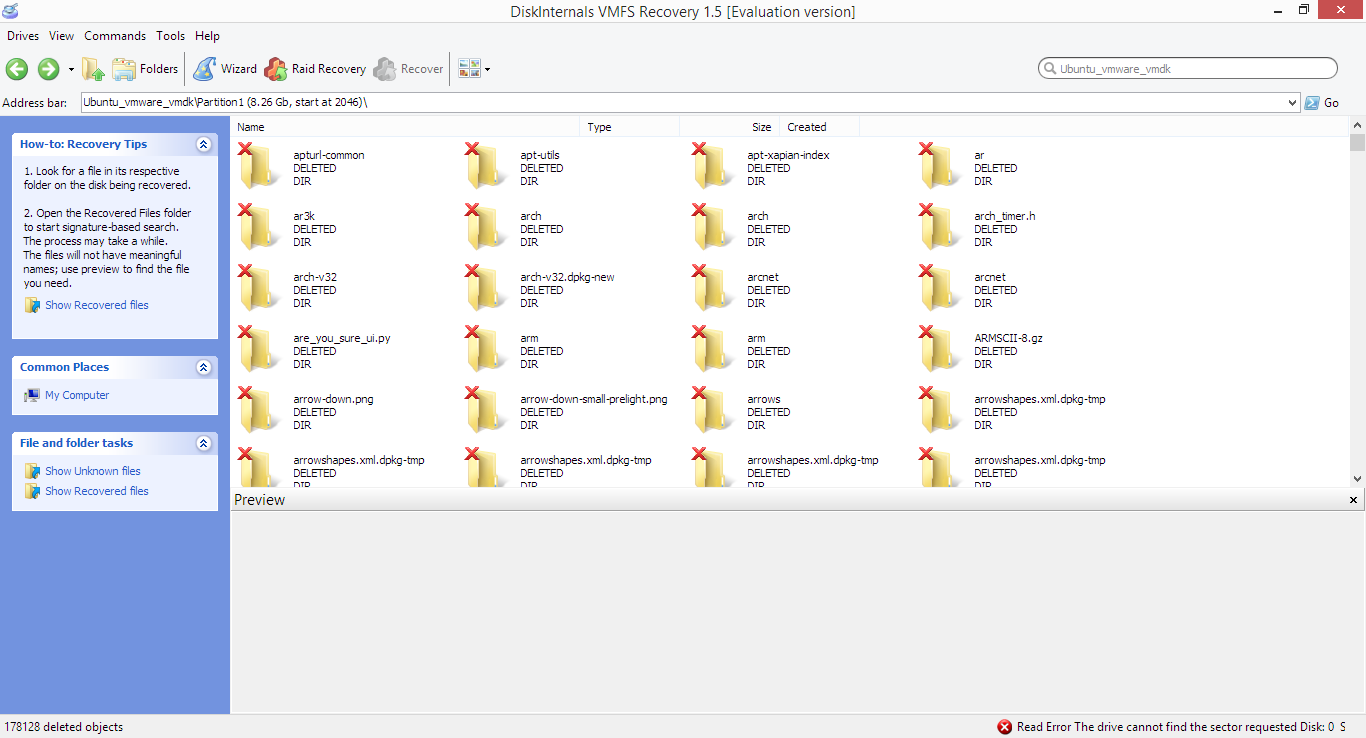
You can enter each disk and browse its content.
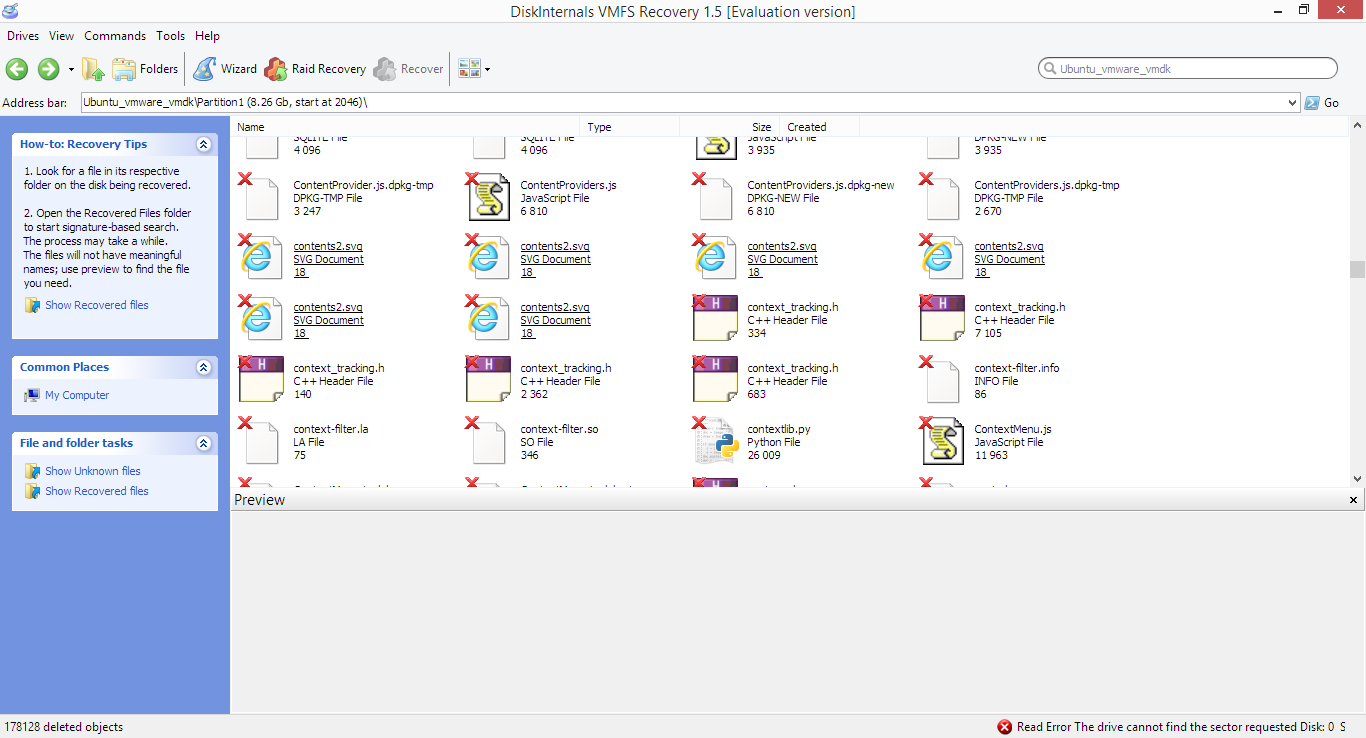

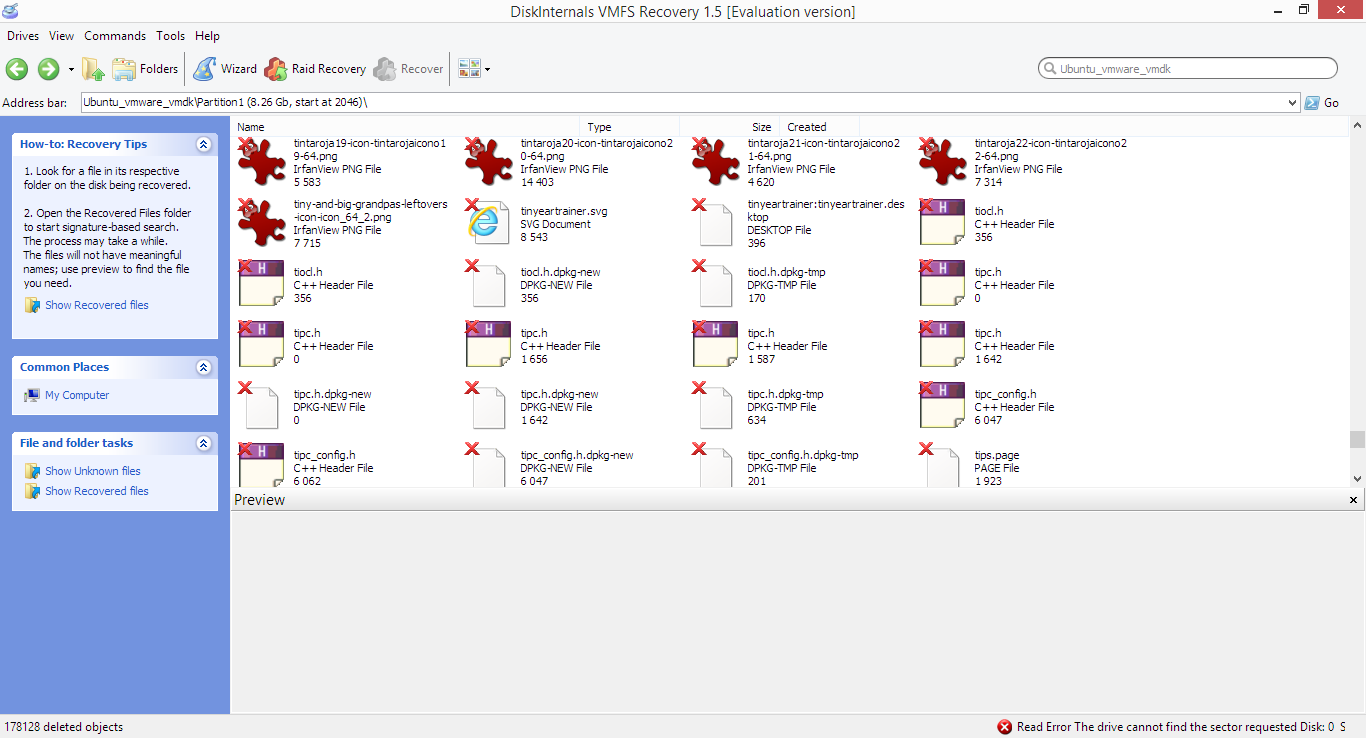

You can click on a file or document to preview.
Clicking on a compressed archive will open the archive and display its content.
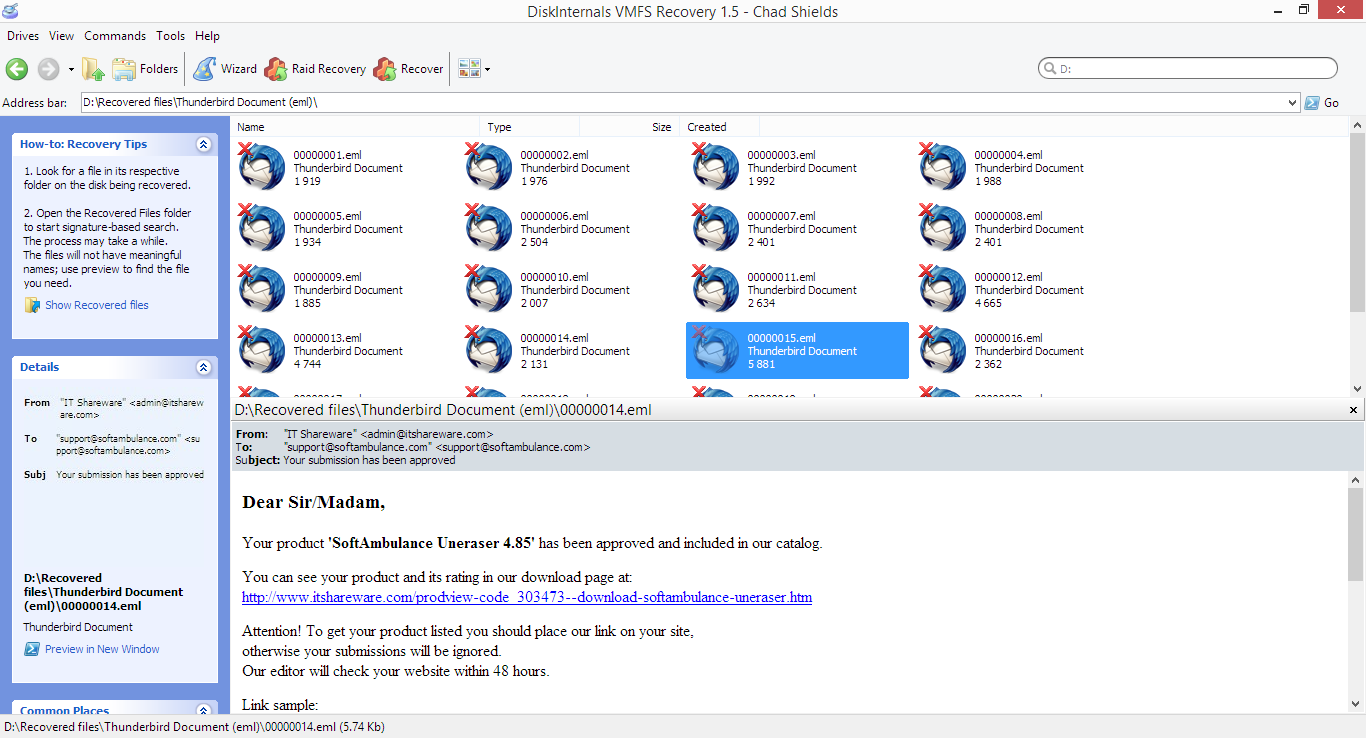
Clicking on an email message will open a preview.
Saving the Data
The Export Wizard will help you save the files you are about to recover.
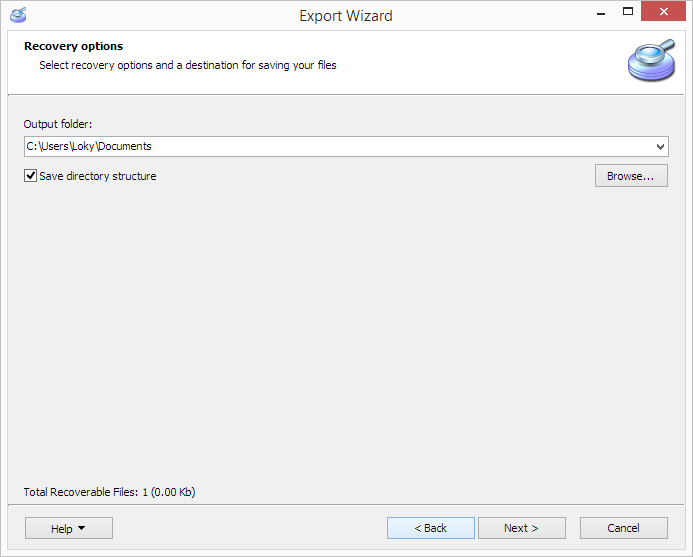
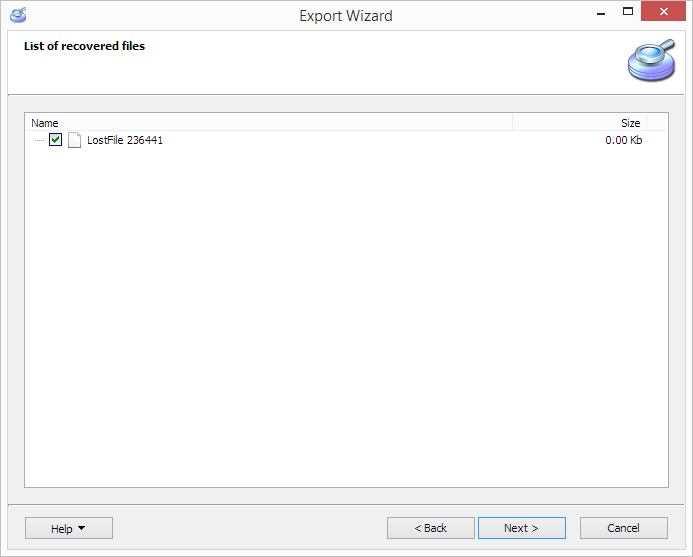
Specify the files you would like to save:
Note: The free evaluation version allows scanning the disks, listing, and previewing recoverable files. However, you will need to purchase a license in order to actually save the files. You will not need to repeat the scanning process after you purchase a license. Simply entering your registration details will instantly unlock the saving feature and allow you to continue the data exporting process.
If you haven’t registered your copy of DiskInternals VMFS Recovery™, enter your Registration Name and Unlock Key in the following window. You will be able to continue the recovery process after unlocking the product.

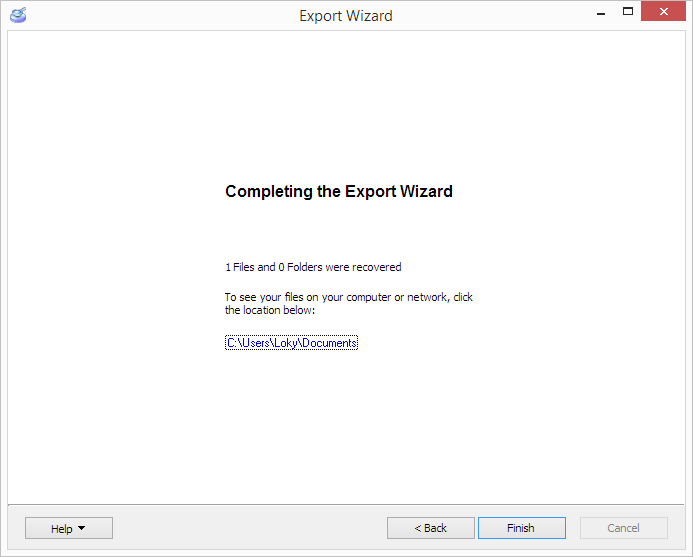
After completing all steps of the Export Wizard, you will see a confirmation dialog. You can click on the link displayed to open the location containing the files you have just recovered. Congratulations! You have just finished the recovery process.